Deploying a Memento app
Deploying a Memento app
Setup
Firstly we'll need a Memento project:
memento init --name MyBankingApp
cd MyBankingApp
The generated project uses Fastlane to provide deployment tools that you can use to automate deployment for this app.
To set up fastlane on your Mac, run the following two commands from the root of your project:
cd ./android
bundle install
cd ./ios
bundle install
Preface
At the root of the generated project, there is a file: .gitlab-ci.yml.
It's worth noting that this file is only an example of how to utilize the build scripts found in ./ios/fastlane/Fastfile & ./android/fastlane/Fastfile to automate deployment for both iOS and Android.
To be able to use gitlab-ci to build mobile apps one needs a computer set up to be a gitlab-ci runner. This is usually much more inconvenient than simply renting machine time via Bitrise or CircleCI.
For more information on those providers
-
Bitrise
-
CircleCI
-
Further Reading
Deploying to Apple's Testflight
This generated project (see Setup) comes with a fastlane script to build a new app bundle.
If we take a look at:
./ios/fastlane/Fastfile
We'll see a Ruby file containing a single function:
lane :run_ci do
   # ...
end
For the run_ci script to work, you'll need to set up code signing as well as the .env variables for connecting to the backend you're using
In the Automating iOS Deployment section of this article we'll get to what the keys and values of these .env variables should be.
But before we do that we need to go over the prerequisites.
To deploy an iOS app one needs an Apple developer account.
Once you have that we need an upload key to be able to upload builds to App Store Connect (e.g. Testflight).
See Apple's article on creating such API upload keys:
Creating API keys for App Store Connect API
Download and store this key in a safe location, when automating deployment.
Automating iOS Deployment
Getting all the relevant ENV variables
If we look again into the run_ci lane from within our ruby script ./ios/fastlane/Fastfile we'll notice that there are a few environment variables for our script to be able to upload a fresh build to testflight.
APPLE_API_KEYThe contents of the App Store Connect API key (upload key). Newlines should be replaced by\nfor it to work.APPLE_API_KEY_IDSeen next to where the Apple API key was downloaded under "AppStoreConnect API" => "Keys"APPLE_API_KEY_ISSUER_IDThe issuer ID for the API key see how to find issuer ID
Setting up fastlane
For fastlane to work you will also need to edit the ./ios/fastlane/Appfile of your Memento project to include:
- Your Developer Portal Team ID (the team_id variable)
- Your App Store Connect Team ID (the itc_team_id variable)
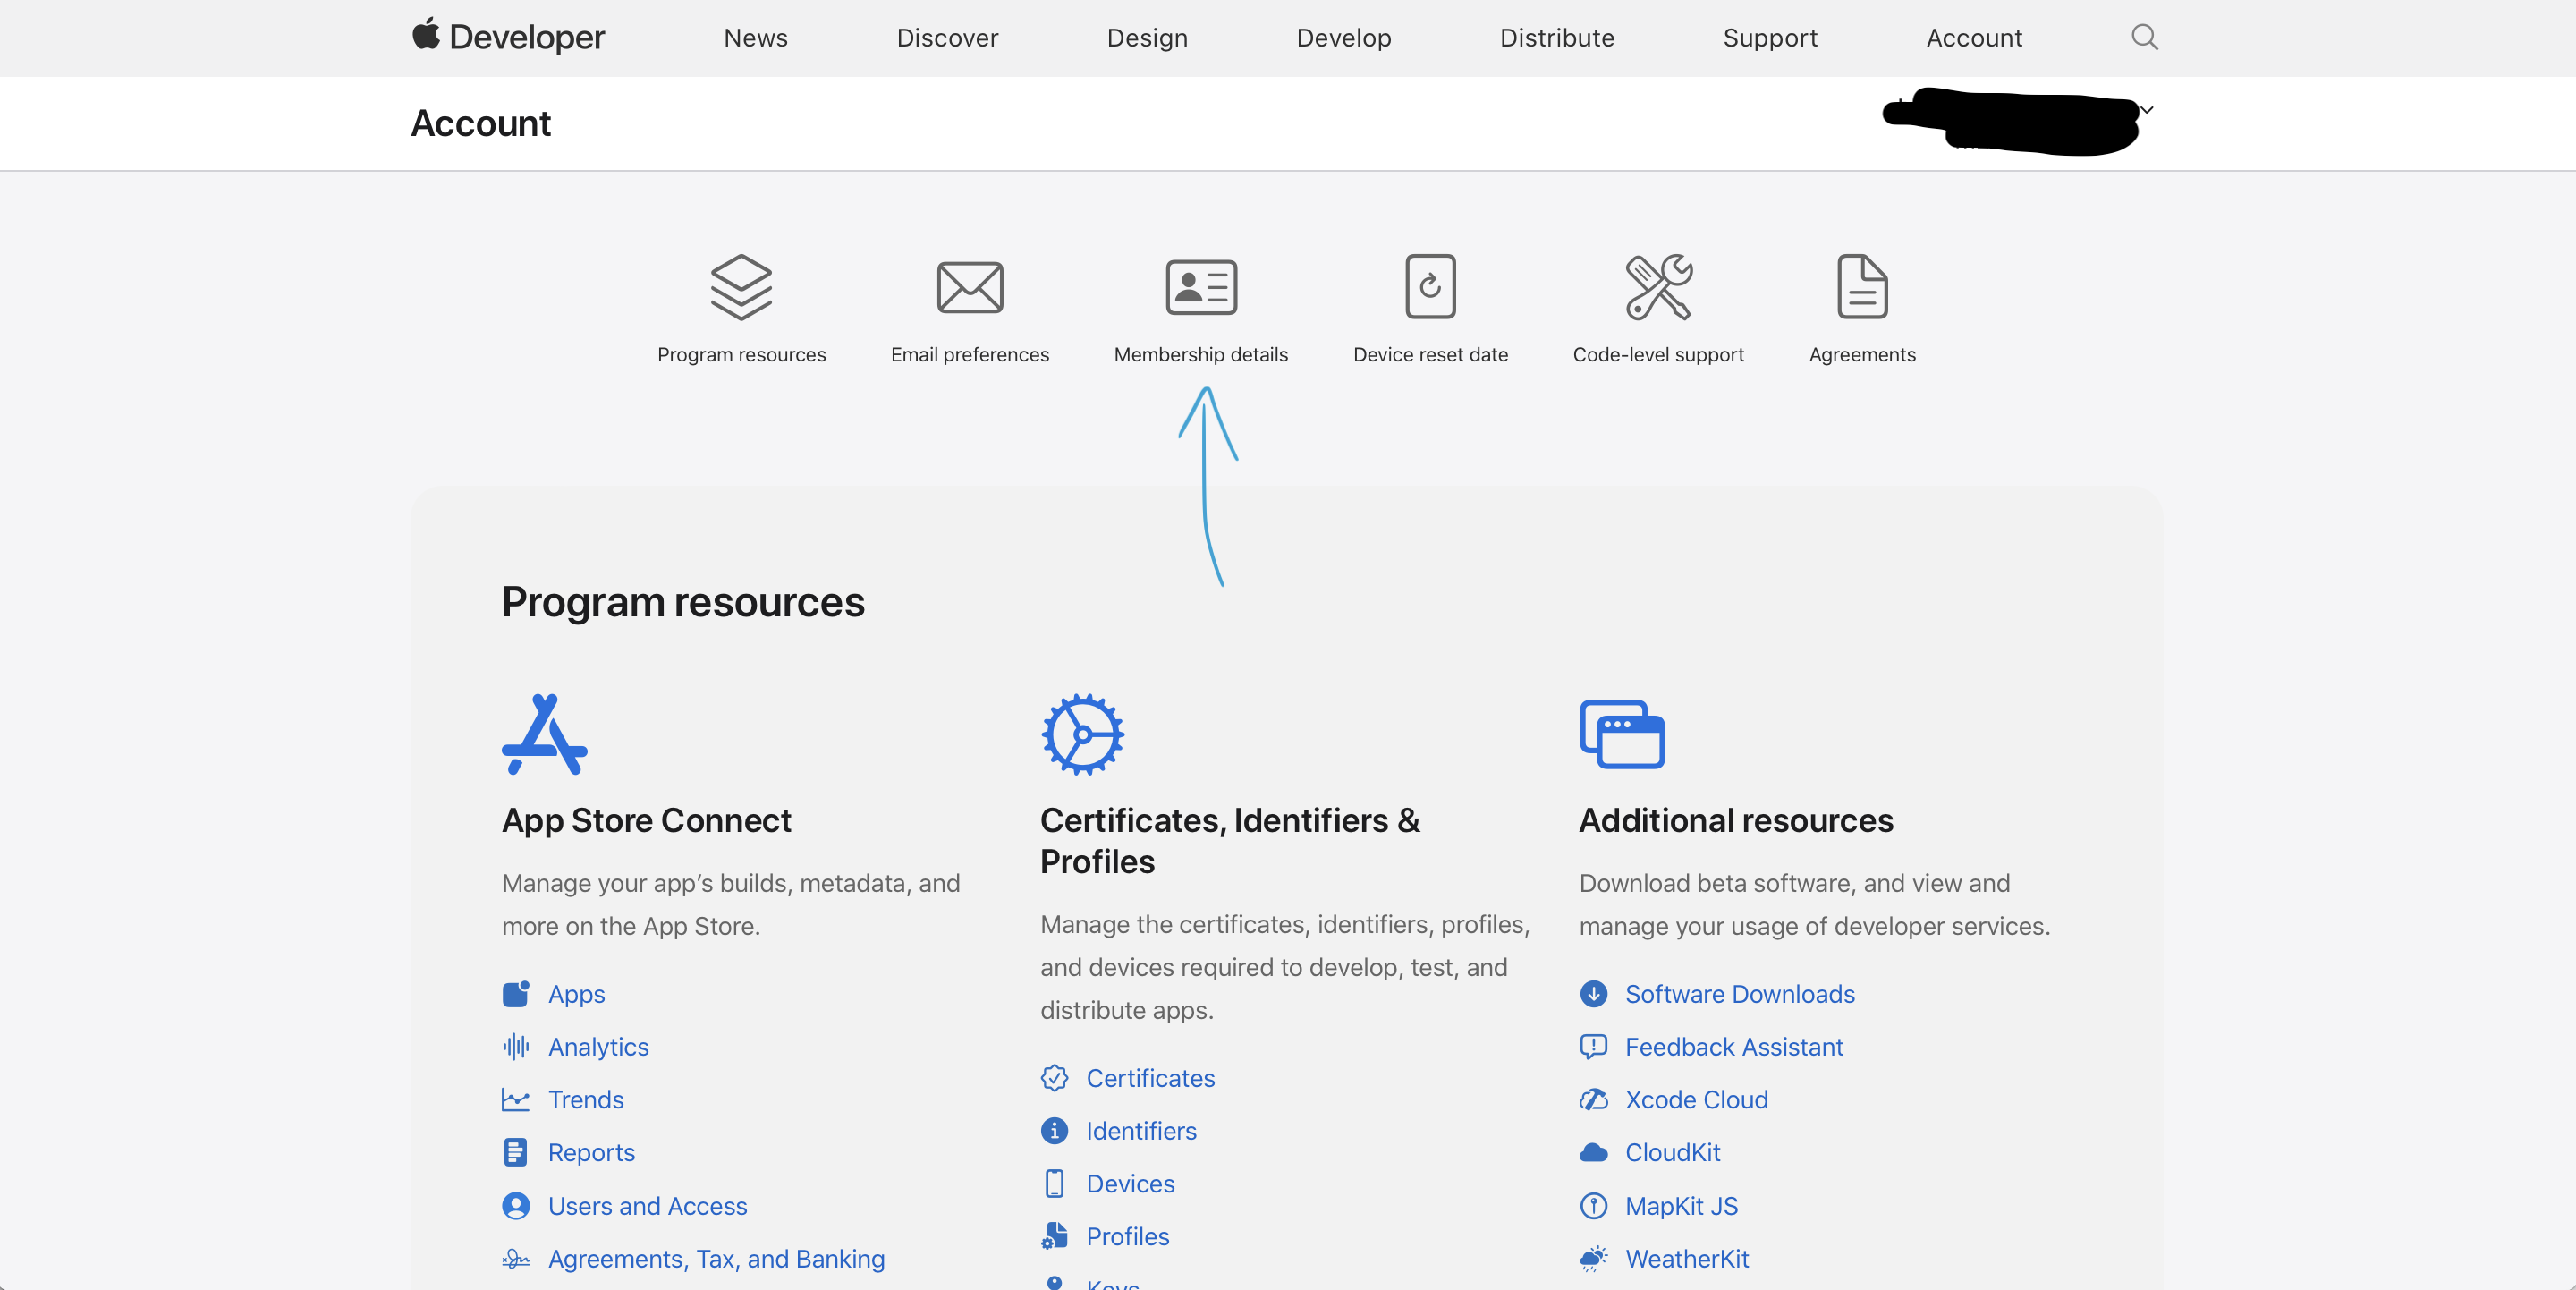
You can locate your Developer Portal Team ID by going to https://www.developer.apple.com/account and navigating to the Membership details section (See screenshot below).
To figure out the App Store Connect Team ID you must
-
Open a terminal app and navigate to your project (with Fastlane installed).
-
For spaceship to work in your memento project, you will need to configure the Ruby version on your Mac to be
ruby-2.7.4, we recommend RVM and:rvm install ruby-2.7.4 -
Run fastlane spaceship command.
-
Enter your Apple credential if your get asked. You may or may not get asked for your Apple credential based on your information in the keychain.
-
Once logged in, enter this command
Spaceship::Tunes.select_team. (If you have multiple App Store Connect teams, you will see a list of teams and their ID.)
Finally for the CI step to work, you will have to set up code signing for your app.
The Fastfile shows an example of how to generate these via match.
For this, please refer to fastlane's match documentation
Deploying to Google Play
This generated project (see Setup) comes with a fastlane script to build a new app bundle.
If we take a look at:
./android/fastlane/Fastfile
We'll see a Ruby file containing a single function:
lane :run_ci do
   # ...
end
This function builds a new Android bundle (.aab) that can then be uploaded to Google Play Console for deployment.
To run the build lane/function we need a few environment variables. These should NOT BE CONFUSED with the .env at the root of the project, the environment variables here are just some variables to specified when we run our lane via a command.
We'll get to what those environment variables should be in a second. But as the point of the lane is to create Android app bundles (.aab) let's first talk a little bit about the process.
React Native has good documentation about how to generate .aab files.
The first part of the RN tutorial will walk you through creating a keystore file with a password.
It then goes on about how to build a new bundle by simply using gradle. The problem with that is that it's hard to set up this type of environment for continuous deployment.
This is why we use fastlane. With fastlane, all you have to do is create that keystore file by following the "Generating an upload key" part of the RN tutorial
When you have the keystore file set up you can create a new .abb bundle by running the following from your ./android folder:
(albeit replace ... with appropriate values)
ANDROID_STORE_PASSWORD='...' \
ANDROID_KEY_PASSWORD='...' \
ANDROID_KEY_STORE_FILE_PATH='...' \
ANDROID_KEY_ALIAS='...' \
fastlane build
Your ./android folder should now have the bundle ready to upload from:
./app/build/outputs/bundle/release/app-release.aab
Automating Android Deployment
For this you need a Google service account with permissions to your Google Play Console.
(Instructions on how to create a service account)
NOTE: Make sure that one of the users added to the service account is a user with appropriate permissions in the Google Play Console.
When you've got the service account, all you have to do then is to:
Modify ./android/fastlane/Appfile with a new json_key_file
json_key_file(ENV['ANDROID_KEY_FILE_PATH'])
In your ci environment make sure to add the ANDROID_KEY_FILE_PATH and have the value a path to the aforementioned Google service account hosted on your CI runner.
Now we are able add a small step to our :build lane which uploads the bundle to Google Play:
lane :build do
    # ... all the previous build steps
    supply(aab: './app/build/outputs/bundle/release/app-release.aab', release_status: 'draft', track: 'internal')
  end
Last thing to do is to add this to your CI scripting.
If you're using GitLabCI, you can modify .gitlab-ci.yml to include the following workflow:
beta_android:
  stage: build
  extends:
    - .prepare_build
  script:
    - cd android
    - bundle install
    - bundle exec fastlane build # THIS LINE!
  tags:
    - android
  only:
    - main
Updated about 1 year ago